Two sisters cooking and creating...and neglecting laundry. Welcome to our slice of the internet!
Showing posts with label How To. Show all posts

Monday, May 7, 2012

Taco Box

How was your weekend? Anything good happen? We did a lot of yard work, which was actually fun! Randy and I both had that Springy itch to get out in our yard and start dinking around. So, there we were- in our yard, on Saturday, working alongside each other with our butt cracks flashing the neighborhood. Anyway, let's talk about this Taco Box:
I saw this Taco Box on the kitchn blog (via Cup of Jo). A neighborhood friend recently had a baby so my friend Kris and I put together our own version (above) of this taco box to take over. I didn't have a wine crate laying around to use like they did over at the kitchn, so I did the next best thing and wrapped a diaper box in wrapping paper. Wink. I also used some happy tape to write TACO BOX on the outside. It looks a wee bit crazy, but I like crazy. In wee bits. 
Here is what we filled our box with: Speciality sodas, tortillas, freshly grated cheese, shredded lettuce, salsa, sour cream, black beans, slow-cooked shredded beef, and stuff to make guac. I packaged the meat (which isn't pictured because it was still slow cooking) in freezer safe bags with the juices so they could have the option to freeze it for later use.
I'm sure there are other things that you could add to this taco box (like you could kick it up a notch and make it a little more gourmet) and you totally should! when you make one of these for a family in need in your neck of the woods.
Thanks to The Kitchn blog for this rad idea! 

images by Briana

Friday, April 13, 2012

Crafty Yarn Wrapped Letters

Our Spring Break isn't feeling very Springy. The temperatures have dropped and the rain has come. We even got a little snow last night! We are still making the most of it though. Yesterday we stayed inside and spent the morning making yarn wrapped letters. I was inspired by a recent The Land of Nod catalog where they had a whole alphabet of craft paper letters decorated with baubles and wrapped with yarn. I thought it was a really great spread. Did you happen to see it?
We made our own version of them at home using materials we already had. My initial thought was to cut the letters out of a diaper box, but that got thrown away and then I remembered I had a piece of foam core that was banged up and no longer pristine to photograph food on, so I used that. This is a fun project and there are so many different ways to wrap your letters and be creative. Here are some pictures and details on this project, if you'd like to take a look:
Materials needed:
-kraft knife or scissors (depending on the type of material you use)
-foam core or cardboard
-yarn (colors of your choice)
-tape
-template {{HERE}} is the template I used and printed off. I cut the letters about 1/4 inch larger on all sides because I wanted a bigger letter. There are plenty of templates on the web to choose from- different fonts and sizes, etc. My google search was 'alphabet letters template'.
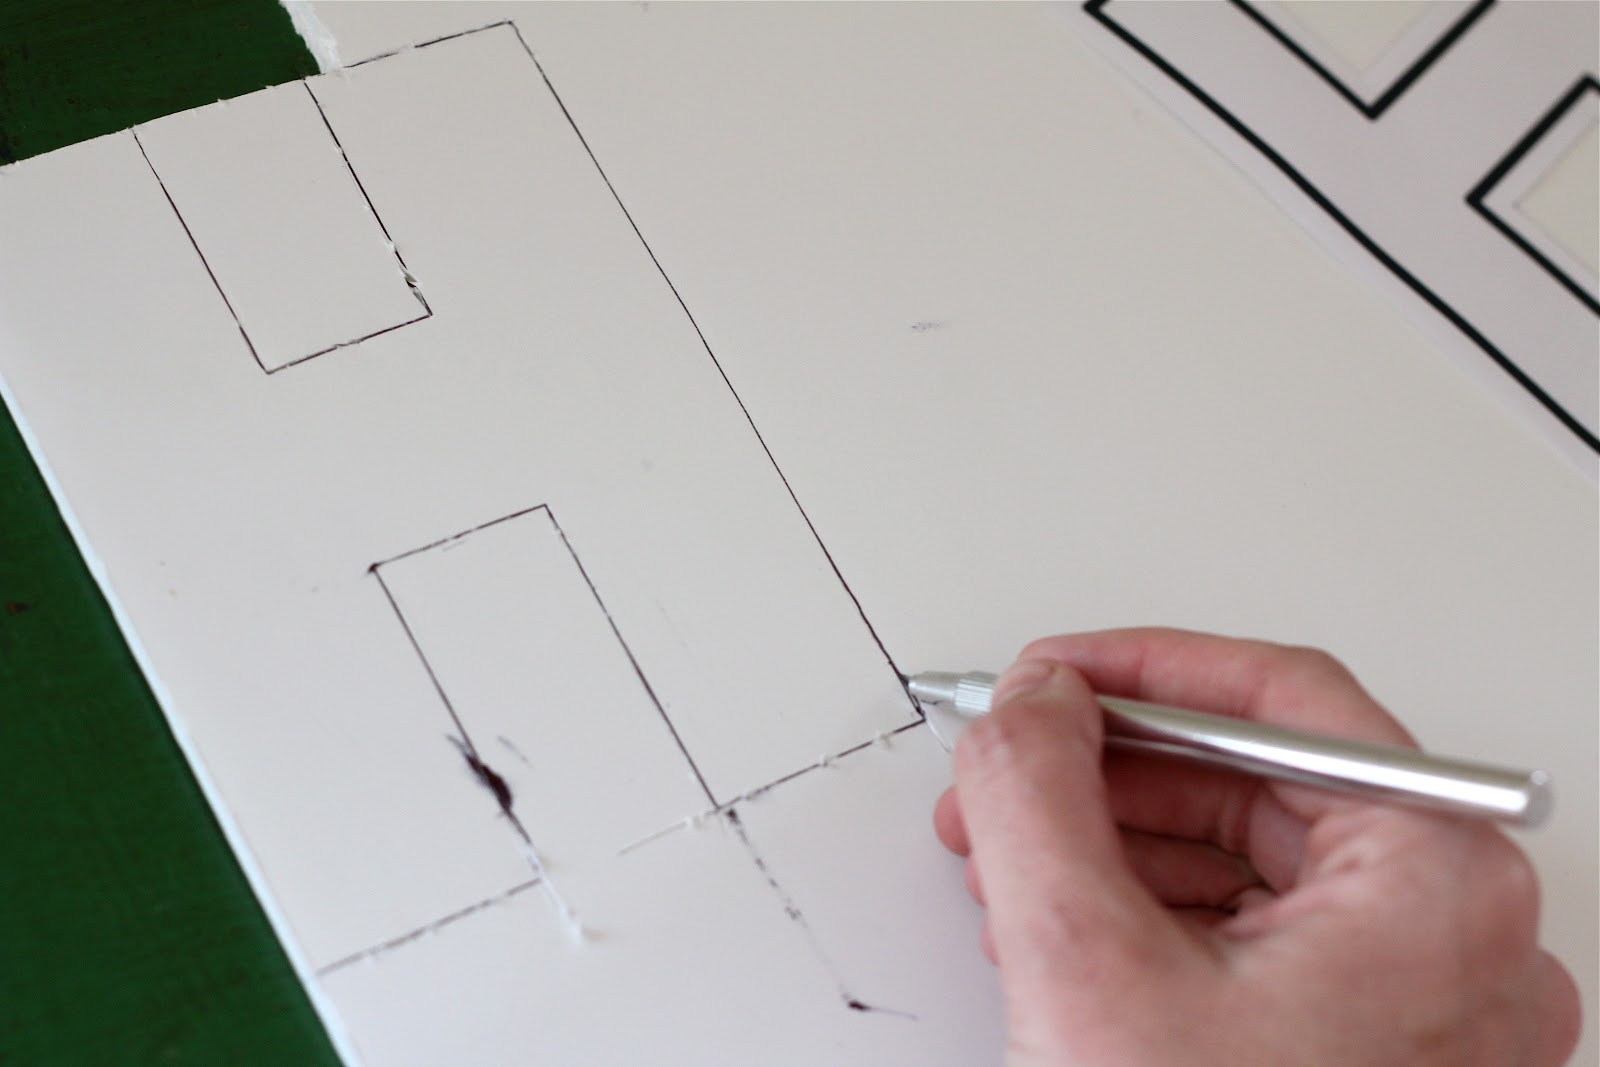
Trace and cut out your letters. Don't be worried if your cuts aren't perfect.
Wrap your letters, making sure to wrap thoroughly for good coverage. Secure each sections of yarn on the backside with tape. Before you wrap, think about how to wrap your letter since every letter of the alphabet is different and will require a different strategy.
For Lily's L (above), I wrapped it more uniform and went for a ombre/watercolor graduated vibe. Hadden's H (below) is wrapped more willy-nilly. I adore how both turned out. Just have fun and do what feels good to you.
When you've finished wrapping and securing your yarn, hang your letter. Use plasti-tac or something that won't damage paint underneath (I used removable glue dots from my stash). I hung the letters on the girls' doors, but you could hang these anywhere, really!
If you decide to make some letters of your own, I'd love to hear how it goes! Have a lovely weekend! See you next week!

images and project by Briana

Friday, April 6, 2012

Flower Crowns for Easter

Flowers worn in the hair is so lovely and perfectly feminine. When I was little, I'd daydream of getting to wear a crown of flowers in my hair for a special occasion. Now that I'm older, I don't think I could pull off the flower crown, but by golly I've got two little girls who can! I thought it would be sweet to make them some flower crowns to wear with their Easter dresses.  I wasn't going for fussy or grand here, just sweet, simple and pretty. I think we accomplished that and the look on the girls' faces when I presented them with their crowns?! Gasps and excitement aplenty. 
I envisioned this post to have pictures of Lily and Hadden, holding hands and being all sisterly and photogenic. Ya know, real high hopes! But, it was not to be, Hadden wanted to stay in her pj's and insisted that the enchilada sauce remain smeared on her adorable cheeks. ;)
Notes on the crowns: It took me twenty minutes to make two crowns. I would recommend making these the night before or the day of wear. For the purpose of this post, I made crowns for the girls today. I will make fresh ones for Easter Sunday. Here is how I made them, if you'd like to take a look:

Materials needed:
-floral tape
-flowers *Use any variety you prefer, Lily's crown is made up of small daisy like white flowers. These can be found at any flower shop, even at grocery stores. 
-string
-scissors 
Take string and measure it around the head of the person you are making the crown for (measure the string the way it is intended to be worn). Tie a knot.
Clip flowers and place around the string. This will give you an idea of how many flowers you'll need, what directions look best.
Take floral tape and wrap (with good tension) bundles of flowers around the string until you've made up your flower crown. See above. Try your best to wrap the tape so it's concealed behind flowers. Store flower crown in fridge before use.
Thanks for letting me share this today and for popping in! 
I hope you all have a wonderful weekend ahead of you. I am looking forward to spending time with family and celebrating the resurrection of our Savior, Jesus Christ.

images and project by Briana

Wednesday, March 28, 2012

How To: Fabric Easter Eggs

I'm really excited about stuffing my girls easter baskets this year. Here are some ideas bouncing around my head: big beach towels for the pool (I'm on the hunt for mermaid ones!), flip-flops, bubble wands, sidewalk chalk, sunglasses and candy, of course. P.S. My favorite easter candy growing up was the gum in the mini egg cartons. What was yours?
I also wanted to make a little handmade something to stuff in their baskets. I thought some little eggs made out of felt and stuffed would be cute. They could use them in their little kitchen and when they play "grocery store" or sometimes they call it Wal-Mart. "Let's play Wal-Mart!"
Problem was, the felt I thought I had was long gone from another project I forgot I even did. I decided on plan B and made them out of fabric scraps. I think they turned out adorable and they've got that handmade flavor, but I do think felt would be ideal for this project. Here is how I made these little charmers:
You'll need:
cotton balls
fabric or felt of your choice
embroidery thread
embroidery needle
scissors or pinking shears (to prevent fraying)

Step 1. Click {{HERE}}. Hold a piece of white paper up to your computer screen and trace the egg template onto your paper. Cut the egg out. Hold the cut-out egg up to your fabric with your thumb and cut fabric into egg shapes. Double up your fabric while cutting to save time and make the front and back side of your eggs exactly the same shape.
Step 2. Pull apart three strands from your embroidery floss (Embroidery floss makes up 6 strands). I used the whole length of the embroidery floss to make four eggs. Thread your embroidery needle. Knot the end. Using a blanket stitch, stitch around the edge of your fabric egg. Making sure the right side of the fabric is facing out. {{HERE}} is an excellent video on how to start, do and finish a blanket stitch. Super duper simple.
Step 3. Leave a couple inch opening and stuff the egg with cotton balls. I used three cotton balls per egg. Tear and pull apart the cotton balls to better help them fill in and around the inside of the egg. 
Step 4. Stitch up the opening. Finish it by knotting the thread to secure the stitches. It shows you how to do this in the video.
Thanks for letting me share! Now, I want to know what you like to fill your kids easter baskets with! I'd love to hear your ideas.

project and images by Briana

Friday, February 24, 2012

How To: Coconut Butter + Coconutty-Pineapple Oat Bars

This week felt like Spring. The snow is melting, the sun is out, the temperatures are warming and a wave of I-must-clean-and-dejunk my house came. I cleaned out and organized my closet last night and I'm feeling like a new woman! Hopefully there are signs of Spring wherever you may be and that you have some fun plans for the weekend. Before I split, I wanted to share with you how to make coconut butter. All you need is unsweetened shredded coconut and a food processor (I suppose you could also use a high powered blender). Here is how ya do it:
Throw the unsweetened shredded coconut in your food processor and power it up. I put in about 2 cups shredded coconut and it took about 8 minutes to turn the shredded coconut into butter (the more shredded coconut you put in, the more time it will take).
This was 5ish minutes in and it is getting close! Feel free to scrape down the sides with a rubber spatula if you feel like it.
Couple minutes more and you have this dreamy concoction. Now what do we do with it?
I used mine and whipped up a pineapple-coconutty oat bar concoction (in the same family as a granola bar). I'm sharing the recipe below if you're interested. You can also use it to top pancakes, muffins, waffles, etc. I'm excited to experiment with it in my baking. The coconut butter will set up and solidify at room temperature so if you want to bring it back to a liquid consistency- heat it up in the microwave for a few seconds. If you use coconut butter, I'd love to hear your ideas so leave a comment!

Here is my Pineapple-Coconutty Oat Bars (is this what I should be calling them?), keep in mind that I didn't measure anything, I just sorta eyeballed, tasted as I went, and added things until the mixture reached the right consistency. Enjoy:
Recipe (yields 10 bars from a 9 in square pan):

2 1/2 ish cups oats
1/2 cup almonds, roughly chopped
3/4 cup chopped dried pineapple (I think mangos or any other dried tropical fruit would also be good)
2 cups unsweetened coconut made into coconut butter (two cups unsweetened coconut will make around 3/4 cup-1 cup coconut butter)
1-2 tablespoons honey (or agave)
1/2 ish cup hot water
1/2 cup unsweetened coconut, toasted

Preheat oven to 350 degrees. In a large mixing bowl combine oats, almonds, dried pineapple, coconut butter and honey. Wash your hands and mix ingredients by hand. When everything is combined, give it a taste and add more honey if it needs more sweetening. Add hot water until the mixture reaches a good sticky consistency. Turn mixture into a parchment lined 9in square pan and spread evenly. Sprinkle and press toasted coconut evenly over the top. Bake anywhere from 15-20 minutes. You want the bars to firm up nicely. Remove and cool completely before cutting into bars. Store in an airtight container. *I thought they tasted better the next day. 
Thanks for stopping in and I'll see you next week! xoxo
Pin It

Monday, February 20, 2012

Three Things

Happy Presidents Day! Long weekends RULE, don't ya think? Today I'm sharing three RAD things that I've seen around zee blogs that I decided to make and and do: A DIY mirror, a yummy soup, and Apple Cider Vinegar as toner! 
1. After seeing this round-up of DIY (SHIM) sunburst mirrors on Little Green Notebook, I decided I'd give it a go since all the sunbursts I've admired over the years cost around three-hundy. The above picture is my finished mirror in all its gilded glory hanging above our bed. This project isn't difficult, but it does take time and patience. I mostly followed her instructions, but I did do a few things different (in case you decide to make one yourself): I used a 12 in round mirror from Michael's (not a 10 in), I painted the whole thing using Martha Stewarts Metallic Paint in Vintage Gold (from Home Depot, comes in a 10 oz container) as opposed to spray painting it and I used screws and wire as my hanging hardware instead of the teeth attachment. Click {{HERE}} for the tutorial.
2. Potato, Sausage and Kale Soup. I had this soup at a luncheon awhile back and really enjoyed it and then my friend had it brewing in her home one afternoon and her house smelled phenomenal and then Sophistimom posted a version of the soup on her blog. I decided it was high time I make a batch of my own! A double batch, athankyou. I followed Sophistimoms recipe to a T. It's delicious and I love that I found another purpose for kale. I even took some to my grandparents and they loved it! {{Click HERE for the recipe}}
3. Apple Cider Vinegar is my new toner! It has to be an Apple Cider Vinegar with the "mother" in it. I started doing this a couple weeks ago when I saw this post via A Blog About Love. My skin is softer, my T-zone doesn't produce as much oil and overall my skin just looks and feels cleaner. And it's all natural! I'm totally sold. All I do is pour a little Apple Cider Vinegar on a cotton disc (like you would with nail polish remover), then I just quickly run the vinegar soaked cotton under running water to dilute the vinegar a little. Then I swab it all over my face, starting with my T-zone first. The smell doesn't bother me and once it's dry and absorbed you won't be able to smell it. Give it a try! Read all about it {{HERE}}.

Thanks for letting me share these three things with you today and thanks to the awesome bloggers who inspired me to do them! Check ya later. xoxo

all images by Briana
Pin It

Monday, February 13, 2012

Chilled Hot Chocolate Panna Cotta & Appliqued Hearts

Since the big "LOVE" day is tomorrow, I thought I'd show you an incredibly simple dessert that will make your sweetie swoon!  Remember the Vanilla Bean Panna Cotta recipe??  Well, I decided to modify it to make a chocolate version and holy smokes!!!!  It tastes incredible!  The first bite I took was like chilled, creamy hot chocolate heaven!  Thus the name!  My Mom said, since it does have a hot chocolate flavor, that I should serve it with a dollop of marshmallow creme!  Well Mom, you are a genius!!  It adds the perfect touch!
What you'll need:


3 tablespoons water
1 tablespoon gelatin
4 cups heavy cream
2/3 cup granulated sugar
1/3-1/2 cup cocoa powder (depending on how intense you want the flavor)


In a small bowl measure the 3 T water and sprinkle the 1 T gelatin in the water. Allow it to bloom for 10 minutes.  
In a medium saucepan, over medium heat, heat the cream, sugar and cocoa powder.  Stirring frequently to dissolve the cocoa.  Once the cream mixture is nice and hot remove from heat and add the bloomed gelatin.  Stir to let the bloomed gelatin dissolve completely.  Pour into whatever size cups you would like.  I did mine 1/2 cup servings which yielded a little over 8 servings.  Cover each cup with foil and into the fridge for at least 3 hours.  Once they have chilled completely, you can either eat them straight from the cup or run the sides and bottom of each cup under hot water(making sure no water gets in the cup;) to loosen the panna cotta.  Then turn out onto plates, dust with cocoa powder and a dollop of marshmallow creme and you are good to go!


Now for the appliqued hearts!:)


A few weeks ago I ordered the most soft and buttery organic cotton onesies and today I decided to get brave, pull out my scrap fabric and the Heat-n-Bond and have a party!  Well, a party for 1 that is!  I used Heat-n-Bond Lite(sewable in the purple package) and followed the directions precisely on the back of the package.  Once I had my desired fabric heart shapes ironed on the onesies, I just used my straight stitch and outlined all the way around the heart.  It was a little rough at first but I got the hang of it after using my seam ripper more times than I want to count.:)  I call this the "Heart Over Heart" onesie.


I know the pictures of Q are excessive but I couldn't help myself!  She had just gotten up from her nap and was full of personality!  

images by Kara  


Friday, February 10, 2012

How To: Arranging Your Valentines Day Roses

When Randy and I were first married I worked at a flower shop in Salt Lake, Artichokes and Co. (now Olive and Cocoa). I also had the opportunity after that to work with Brenda of Pocket Full of Posies on some weddings. These jobs were pure fun! I look back on that time in my life with a smile. Working with flowers is just plain dreamy. 
As I was thinking about Valentines Day and what posts to share that would be relevant, a light bulb went off to do a How-To on arranging your rose bouquets come Tuesday. Raise your hand if your significant other has brought you a beautifully wrapped bouquet of flowers and then when you go to put them in a vase the flowers flop to one side and just look plain lame. High fives all around! Ok, let me show you how to fix that:
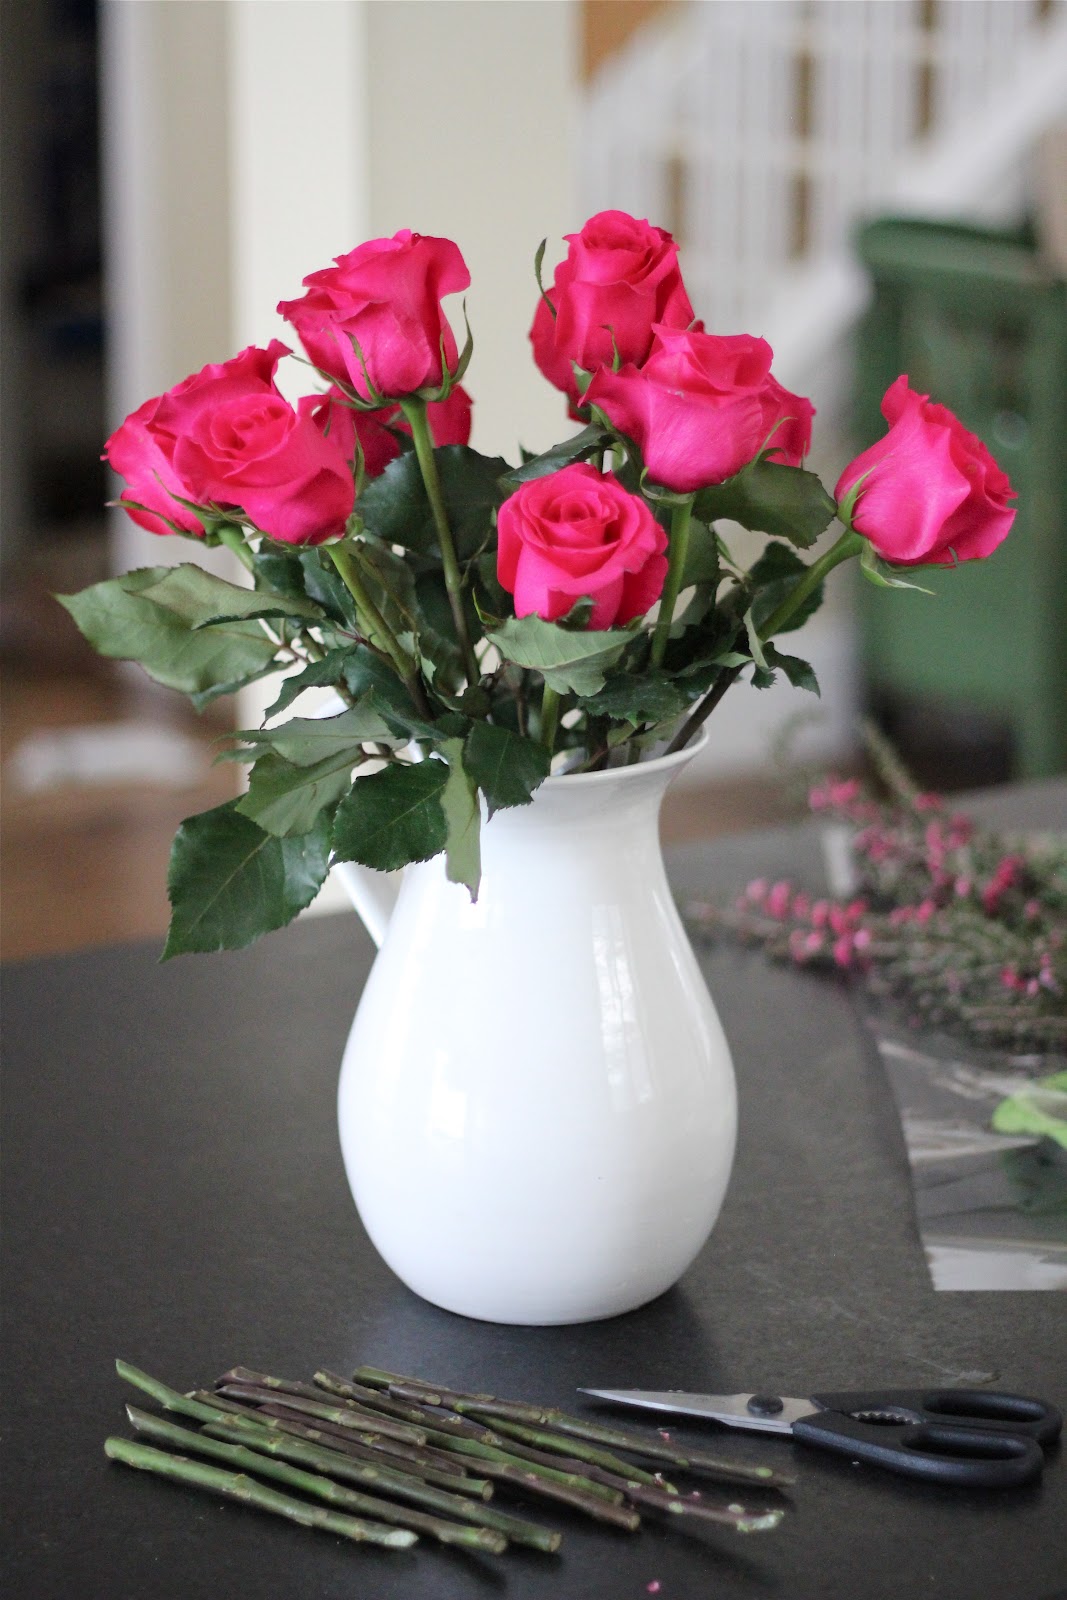
1. Go shopping in your kitchen for a vessel to arrange your flowers in (make sure the opening on your vessel isn't too wide or you'll have a hard time arranging the roses). I chose a pitcher! Fill your vase (in my case, pitcher) 2/3 with luke warm water. Dissolve the "food" packet into the water that came with your flowers. This will increase the life of your roses. Unwrap your flowers and strip away any leaves that will be submerged or touch the water. This is especially important if you are using a clear glass container. The florist has most likely already done this for you, but you may need to do a little stripping yourself.
2. Scoot your vase to the edge of your work surface. Hold a rose up to the vase with the stem hanging down (I taped the rose to the pitcher here because I couldn't get the right shot by holding it). Raise and lower the flower to determine the height you want your arrangement to be. I drew on the picture to help illustrate this better. I usually leave about a third of the flower above the rim. Once you have determined the height you want, cut (the sharper the scissors the better) the excess stem off at the base of your vase at an angle. It's very important that you cut the stem at an angle to create more surface area for water to be drawn in.
3. Proceed to cut all roses the same height (ish) as the first. As you cut, place each flower in your vase at an angle, criss-crossing the stems. This creates stability to build the roses up how you want them. As you go make sure to turn your vase to view all angles of your arrangement. If you feel a stem is too long, simply trim a little off and reposition or swap it out. This is normal and you will need to do this to get the right shape.
4. On your last few roses position them down in the center of your arrangement. The criss-crossed stems will keep them stable and upright.
5. When you are satisfied with the shape of your arrangement, take the greenery and fill it around the base of the roses (refer to above picture). Trim it as needed to get the right height. Strip the greenery of any leaves that will be submerged in the water. The greenery is fun to do because it hides errors and gives your arrangement polish.
6. Take any other filler that was included with your bouquet and position it in and around the roses. Trim it accordingly and making sure to strip it of any leaves or things that will be touching or submerged in the water. If you don't, it'll make things scummy, therefore the water won't be as fresh, therefore your roses won't last as long. Sorry if you heard me the first time I said that.
7. Lastly, trim away any leaves or greenery that looks limp and pull any rose petals that are flopping or torn. And voila!
This took me 15 minutes to do and I know I have flower experience but I promise you can do this! I actually really wanted to do a video to show how to do this, but that wasn't possible today. Hopefully I've explained everything clearly, but leave a comment if you have a question and I'll respond in the comments. I've also got other ideas for simple floral arranging and tricks to share with you, so look for those posts in the future. Hope you have a fab weekend! Thanks for stopping by today! xoxoxo

images and how-to by Briana
Pin It

Monday, January 23, 2012

Watercolor Mini Heart Garland

My four year old (in two days!) and I made this mini heart garland this afternoon while the snow fell and baby sis napped. We had such a good time chatting and creating together. It was good therapy. The finished garland is sweet as can be and Lily can't wait for daddy to get home to show him our "Valentine decoration". :) Here is how we made, if you'd like to take a look:
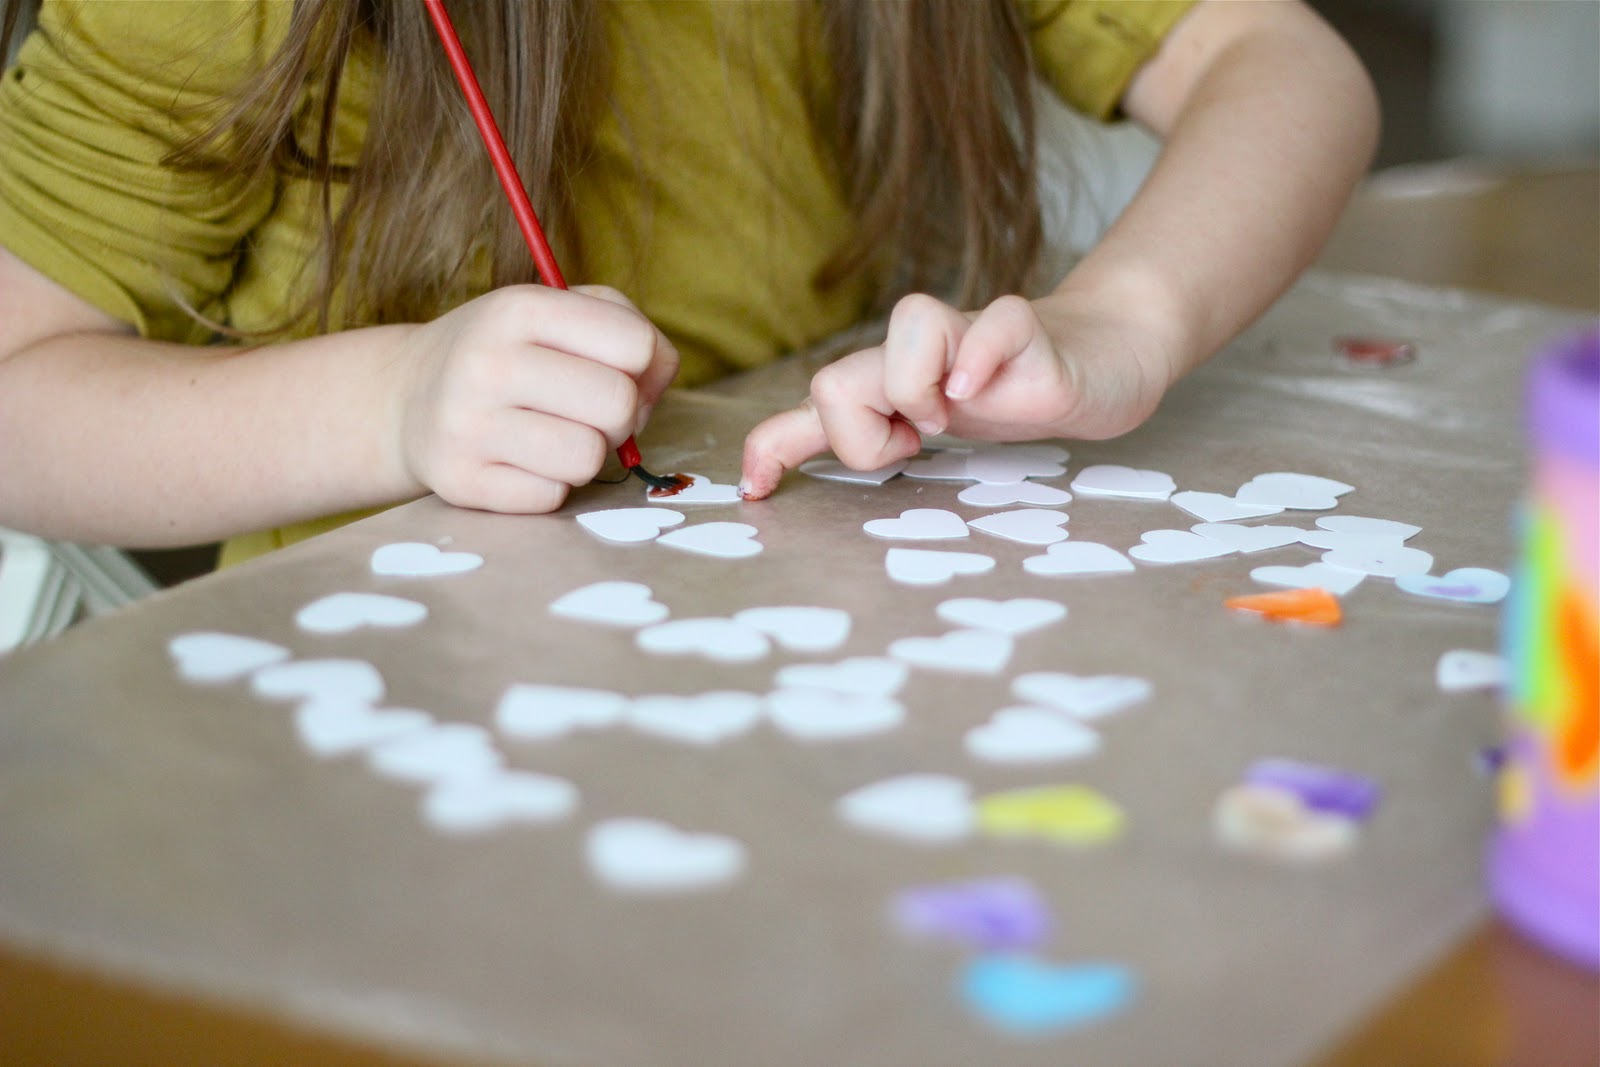
Punch or cut mini hearts out of white card-stock. You can line the hearts up simulating the finished garland to get an idea of how many hearts you will want to punch out (or cut).
Lay hearts out on waxed paper and get to watercoloring each heart. Have fun and play around. We liked the look of layering the watercolors. Pink watercolored over yellow and red watercolored over orange, for example. You can also play around with brush techniques for different effects. Once you've finished painting all the hearts, flip them over and watercolor the other side.
Allow hearts to dry for a few minutes. This doesn't take long.....I guess it may take longer if you live in Hawaii. You jerk.
Before you sew the hearts together, pull your top thread and bobbin thread so you have excess thread for ease when you hang your finished garland. You can use any color of thread that you prefer to sew the garland together. I used a pink thread that I had on hand and I loved the way it coordinated with the hearts. Sew hearts in a continuous line to make up the garland. Make sure you back-stich the beginning and end of your garland!
All done and ready to hang!
images and project by Briana
Pin It