Two sisters cooking and creating...and neglecting laundry. Welcome to our slice of the internet!
Showing posts with label Entree. Show all posts

Wednesday, June 20, 2012

Spicy Blackened Chicken with Avocado Relish

My kitchen facelift is finished! I'm so happy and pleased with how it all came together. But, we'll talk more about that later- I've gotta get this post published so I can get Lily to swim lessons!
This dish was one of the first things I made after I got my kitchen all put back together. The pictures were taken with my iphone-- I'm a lazy lame-o, I know. I've had this recipe bouncing around my head and I'm so glad that it tasted as good as I imagined it to be. Creamy avocado with some tang mixed with the spicy blackened chicken is a really killer combo. Serve this with some corn on the cob and you've got yourself a meal! Here's the recipe:

Recipe (serves 4):
4 boneless skinless chicken breasts, pounded evenly to 1/2 in thickness
1 tablespoon olive oil, plus more for cooking
1 teaspoon paprika
2 teaspoons ground pepper
1 1/2 teaspoons coarse salt
1 teaspoon cayenne pepper (reduce this by 1/2 if you want to make it less spicy)
1/2 teaspoon dried oregano
1/2 teaspoon dried thyme
1 large garlic clove, minced
-Preheat your grill to medium-high (or large pan, medium-high over the stove). Clean and lightly oil grill. 
-In a small bowl, combine paprika, ground pepper, salt, cayenne, oregano, thyme, minced garlic and tablespoons of oil. Rub all over chicken breasts
-Grill chicken, about 2-3 minutes per side or until juices run clear and the breasts are firm to the touch. Transfer chicken to a cutting board and tent with foil. Allow to rest for 5-10 minutes before serving.
-Transfer chicken to a serving tray and top with avocado relish. 

The avocado relish recipe is from my sister in law, Megan- we all lick the bowl clean when she makes it-

Avocado relish:

2 large avocados, cubed
2 roma tomatoes, washed and cubed
3/4 cup red onion, finely chopped
2 garlic cloves, minced
1 teaspoon, red wine vinegar
2 tablespoons olive oil
1/2 teaspoon cumin
1/2 teaspoon coarse salt
1/4 teaspoon white pepper
2 dashes habanero sauce

Combine all ingredients, toss gently, cover and refrigerate before serving.

Hope you're all having a great week thus far! Thanks for stopping in!


iphone images by Briana

Monday, April 30, 2012

Barbeque Chicken Enchilada Casserole

Chicken Enchiladas are a favorite at our house!  So, a few weeks ago, I decided to take our traditional chicken enchilada recipe and switch it up a bit by cooking the chicken in barbeque sauce and adding black beans to the mix.  The results worked great and the flavor combo was awesome!  


Follow the quantities and directions for our traditional Chicken Enchiladas.  The only differences will be cooking your chicken in bbque sauce.  And instead of mixing the chicken in with the cream of chicken/sour cream mixture, you will spread a layer of the cream of chicken/sour cream on top of the corn tortillas followed by a layer of shredded bbque chicken and then a layer of black beans.  Repeat one more time.  Baking temp and time remains the same.


images by Kara

Wednesday, March 14, 2012

A Recipe From Our Archives + Tips on Filling Manicotti

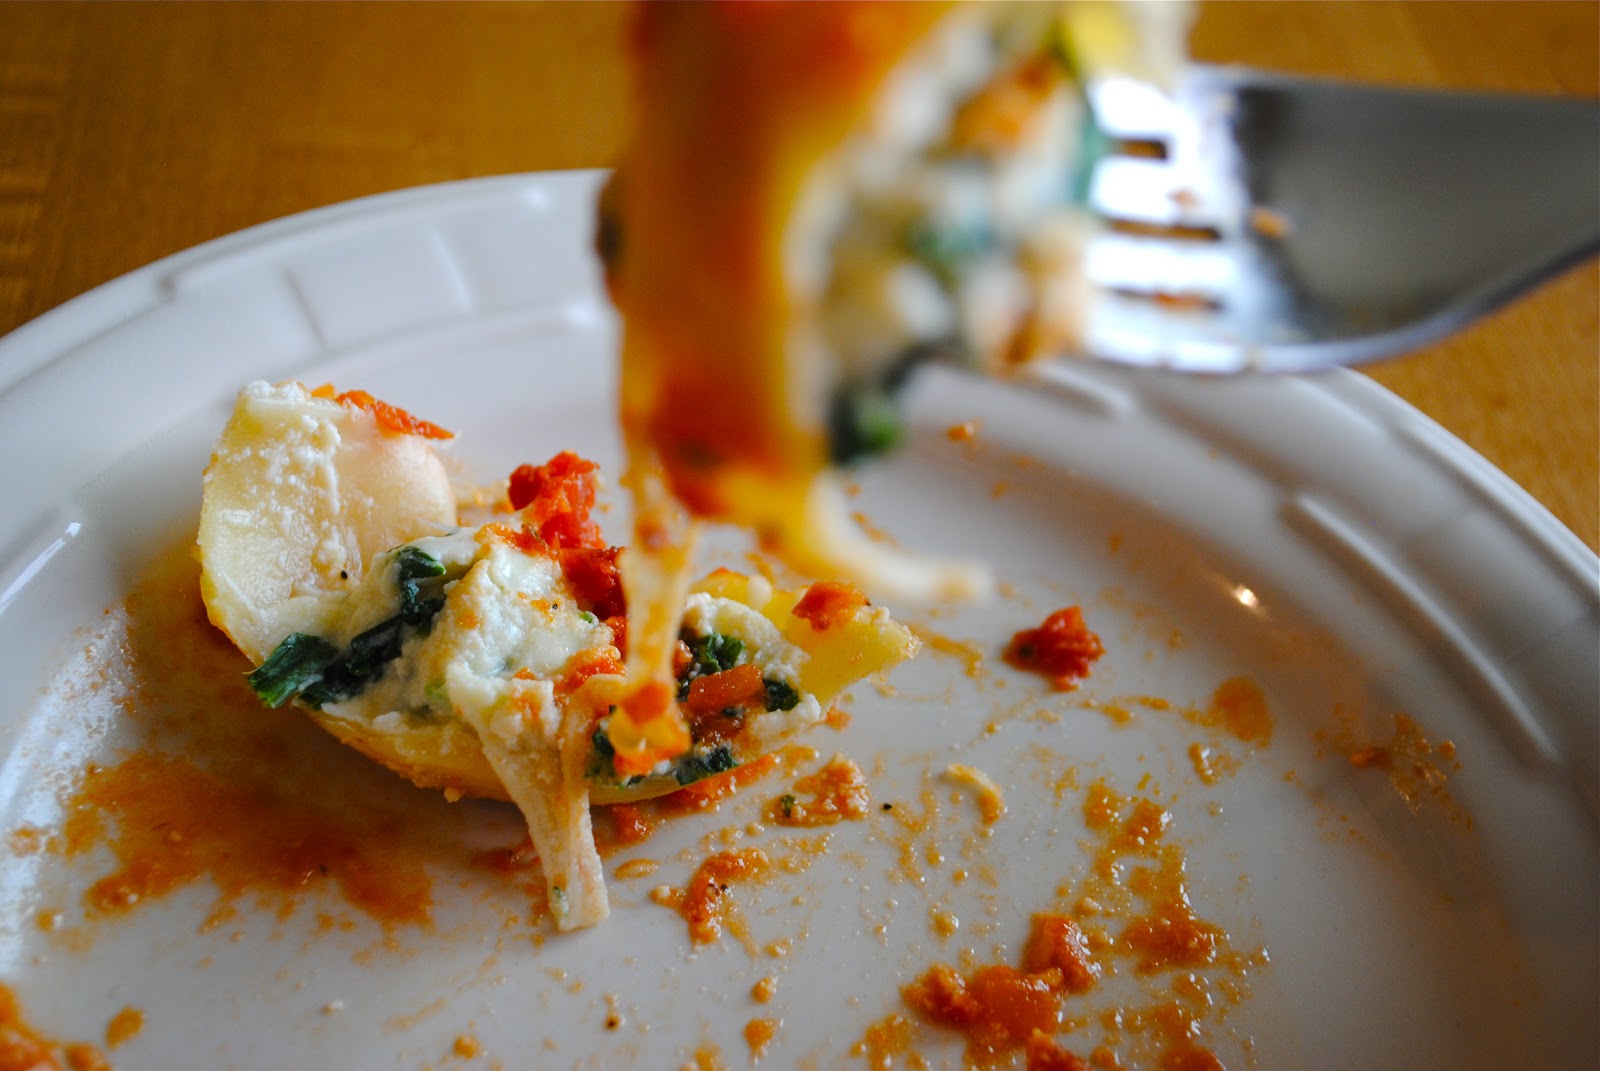
A dear friend recently had a baby, so another friend and I prepared some meals and took them over yesterday evening. Yay for friends! Alison made a homemade potpie that smelled heavenly and I made a good ol' stand-by, shells stuffed with spinach-ricotta filling. I posted this recipe back when this blog was a wee little baby! I wanted to share it again today for any new readers and because it's lonely and forgotten all the way back there in our archives. It's delicious and would you look at that gooey filling!? Enjoy!
Recipe (9x13 pan):
1/2 pound spinach leaves
2 garlic cloves, minced
1 cup whole milk ricotta
1 heaping cup whole milk mozzarella cheese, coarsely grated (not fresh mozzarella)
1 egg
1 heaping tablespoon fresh basil, minced
salt and freshly ground pepper to taste
20 jumbo shells (conchiglione)
olive oil 
2 ish cups high-quality canned tomato sauce or homemade
3/4 cup parmesan cheese, freshly grated

1.Preheat oven to 375 degrees. Lightly oil your baking dish.
2. Wash your spinach leaves carefully with cold water. Transfer leaves with water clinging to the leaves to a medium skillet. Cook over medium heat, stirring with tongs periodically, until leaves wilt evenly. It will take about 3 minutes. Transfer the wilted leaves to a sieve or colander to drain. Drain well and squeeze dry using paper towels. Chop finely.
3. In a medium bowl, whisk your egg. Add garlic, ricotta, mozzarella, basil, chopped spinach and salt and pepper. Mix well.
4. *Cook the shells in a large pot of boiling salted water, until not quite al dente, about 8 minutes. Drain the shells and toss with olive oil to keep them from sticking together.
5. Spoon a  thick layer of tomato sauce on the bottom of your oiled pan. Fill each shell with a heaping tablespoon of the spinach-ricotta filling.Arrange the shells in a single layer on top of the sauce. Spoon remaining sauce over the filled shells. Top with grated parmesan cheese. Cover and bake until bubbling hot, 30-40 minutes.

*When I went grocery shopping to buy shells for this recipe, they didn't have the jumbo shells, so I bought manicotti instead. You can easily use manicotti for this recipe. It does take more time to fill each of the manicotti rolls, but I thought it was fun to fill them. Here are some tips if you decide to go that route:
- Treat the manicotti just like you would the shells, boil for about 8 minutes, drain and toss with olive oil to keep them from sticking together.
- Cut the corner off a large ziploc bag. Push a large mouthed funnel through the hole. Fill the bag with the filling. Squeeze out excess air. 
- Grab a manicotti with one hand and insert the tip of the funnel into one end of the manicotti. Squeeze the filling in (like you would when piping a cake or cupcakes) until you see it peek out the other end.
- If you don't have a funnel and you really don't want to hassle with filling each manicotti roll this way. You can simply trim the manicotti open, lay it flat and spoon a line of filling on it, then roll it up like a burrito or sushi roll. Take care when you serve them so they don't fall apart. Use a spatula.


images by Briana
recipe adapted from Our House To Yours cookbook
Pin It

Friday, March 2, 2012

Veggie Fried Brown Rice

Here is another super clean and healthy, yet incredibly tasty and satisfying recipe for you!  I've made it the last 2 out of 3 days!  That's how good it turned out!  Easily one of my new favorites!  And my kids devoured it too!  This recipe can stand as a meal all by itself or as an accompaniment to teriyaki chicken, beef or pork!  Try it and you will love it!


Here's what you'll need:
1 cup long grain brown rice
2 1/4 cups vegetable stock(I use kitchen basics)
2 Tablespoons olive oil
1/4 of a white onion, chopped
2 celery stalks, cut in half lengthwise and then chopped
1 rutabaga, peeled and small cubed
20 baby carrots, quartered lengthwise
A handful of snow peas, tough ends cut off
2 large mushrooms, cleaned and sliced
2 egg whites
2-3 Tablespoons of low sodium soy sauce
S&P to taste


First, put your brown rice and vegetable stock in a medium saucepan over high heat.  Bring it to a boil, then reduce heat to low, cover the pan and cook for 45-50 minutes.
About 30 minutes before your rice is done cooking, chop your onion and celery and put in a large saute pan with 2 tablespoons of olive oil.  Allow the onion and celery to get tender over medium heat.

Next, add your cubed rutabaga and quartered baby carrots to the tender onion/celery mixture.  Stir and cover with a lid to cook for 10 minutes over low heat. 

Once the rutabaga and carrots have cooked for 10 minutes, stir in the snow peas and sliced mushrooms.  Cover and cook for 5-10 minutes continuing over low heat.

Add your cooked rice to the veggies and stir well.

I don't have a picture of this step, so I apologize.:(  And if you would prefer not to add egg whites, then you can skip this part and move straight to the soy sauce.  Okay, first crack your 2 eggs into a small bowl reserving only the whites. Make a well in the center of your saute pan, moving the rice and veggies to the outer edges.  Pour the egg whites into the well and turn your heat up to medium, allowing the egg whites to cook thoroughly without being mixed into the rice/veggie mixture.  Once the egg whites have cooked, break them up and mix it with the rice and veggies.  Note:  The reason you do not mix the egg whites with the rice/veggies while still raw is because it will form a sticky sort of coating around the rice and veggies before the egg is fully cooked.  Which I don't think is very desirable.:)

Turn the heat back to low.  Now it's time for the soy sauce.  Mix it in thoroughly.

Add salt & pepper to taste and ENJOY!  Makes 4 generous servings!

Recipe by Kara
Images by Kara


Tuesday, January 10, 2012

Perfect Roast Chicken

I'm excited to share this classic recipe today! I know there are countless recipes for roast chicken floating around the internets, but this one is special because it's Ina Garten's! I've made this roast chicken many times and it always comes out perfect. I play around with the flavoring a little here and there but I always use her method, which is very straight forward and simple. Whenever I make this, my husband oohs and aahs over it- little does he know that it takes me the same amount of effort to throw together a casserole. Win, win. If you don't have a roasting pan, don't fret, just use a glass baking dish like I did here (you can place the glass baking dish on a cookie sheet if you are worried about drippings). I also recommend playing around with the root vegetable combinations you use: carrots, potatoes, onions (a must), a bulb of fennel, turnips, golden beets, etc. In the pictures, I've used carrots and onion because that is what I had on hand. Enjoy!


Recipe (8 servings): 


1 5-6 pound roasting chicken (I've used smaller chickens in the past and just decreased the cooking times and ingredient amounts slightly)
Kosher salt
Freshly ground black pepper (in addition to the salt and pepper, I like to use a little Lawry's season salt to season the bird)
1 large bunch fresh thyme
1 lemon, halved
1/2 a head of garlic
2 tablespoons butter, melted
1 large yellow onion, thickly sliced
4 carrots, cut into 2 in chunks
3-4 small to medium potatoes, cut into cubes similar in size to the carrots (remember, you can sub in a different vegetable for the potatoes if you like)
Olive oil


Preheat oven to 425 degrees. 
Place onions, carrots and the other vegetables you are using in a roasting pan (or in my case a glass baking dish). Toss with salt, pepper, 15 thyme sprigs (the rest will be stuffed in the cavity of the chicken) and a glug of olive oil, about a heaping tablespoon. Spread around the bottom of the pan to make a bed for the chicken. Set aside.
Rinse chicken inside and out. Remove giblets, if any, from the cavity. Most chickens, I've found come w/o them. Pat the outside dry with a paper towel. Liberally salt and pepper the inside of the chicken. Stuff the cavity with the lemon halves, the rest of your thyme, and all the garlic. Tie the legs together with kitchen string (this is optional). Place your chicken atop your bed of vegetables, making sure to tuck the wing tips under the cavity of the bird. Pour melted butter over the whole bird, use a brush to spread it around.
Sprinkle outside of chicken with salt, pepper and Lawry's (if using). Make sure you are thorough in covering the whole chicken, but do so with a light hand.
Roast the chicken for 1 1/2 hours, or until the juices run clear when you cut between a leg and thigh. Use a meat thermometer and place it in the thickest part of the breast to check the temperature, as well. When it registers between 160-165 degrees it should be done. If the juices are still not running clear, though, leave it in for another 3-5 minutes then check it again. When done, remove the chicken and vegetables to a serving platter, tent with foil and allow to rest for 15-20 minutes before slicing and serving with the vegetables. 


images by Briana

Saturday, January 7, 2012

Easy Chicken Alfredo Pizza

A few weeks ago I needed to have a dinner plan that wasn't going to keep me in the kitchen all afternoon, but that would still make a statement and seem as if I had spent crazy amounts of time preparing!  So I decided to go to the grocery store, grab a Boboli ready pizza crust, along with a few other ingredients and bam!  Dinner was going to be good!  No excuses guys!  This pizza is so simple!  And let me apologize for the lighting issues in this image.  This time of year is tough when its already dark at dinner time!  But I promise, this pizza is awesome!


Preheat your oven to 350 degrees.


Here's what you'll need:
1- 12 inch round prebaked pizza crust


Melt together and brush on pizza crust
2 tablespoons butter
2 cloves of garlic, minced


Put on top of buttered crust:
4- 4.5 oz cans premium white chicken, drained(I used Swanson brand)


For the sauce, in a medium pan over medium heat, mix:
2 cups milk
1- 8 oz bag of shredded six cheese Italian cheese
Pour over chicken once hot and melty


Sprinkle on top:
1- 8 oz bag of shredded mozzarella cheese
1/2-3/4 cup grated parmesan cheese(not in the powder form)
1-2 teaspoons dried Italian herb blend


Now into the oven for 20 minutes!


image by Kara


Wednesday, November 16, 2011

Zucchini Margherita Pizza

I made this twice for dinner last week!  I'm trying to eat a bit healthier to get the rest of my baby fat off!  A healthy and super yummy alternative to traditional pizza!  I promise you, the flavor was so good, I didn't miss the bread!  


Preheat your oven to 400 degrees.


All you need is a zucchini cut in half horizontally, your fav pizza sauce, fresh mozzarella cheese(sliced), roma tomatoes(sliced) and a little italian herb blend to top it off!  In the oven for 15 minutes until zucchini is slightly tender and voila!!!!!  Big on flavor...not on carbs! 


image by Kara

Tuesday, November 8, 2011

French Bread Pizza

Do you need a super fast weeknight dinner idea?  Look no further!  When we were growing up, our Mom used to make pizza using a loaf of store bought french bread.  It was always a hit at our house.  And a few nights ago, I made it for my own little family and learned it's a hit with them too!:)  


Preheat your oven to 400 degrees.
All you need is a loaf of french bread sliced horizontally in half, your favorite pizza sauce, any toppings, any cheeses you would like and BOOM!  In the oven for 10 minutes.  DONE!
I would say that 1 whole loaf would serve a family of 6. {that's with tiny kids, not all adults}


images by Kara

Monday, October 17, 2011

Slow Cooked Teriyaki Glazed Pork Tender Loin

This was dinner yesterday!  And BOY was it GOOOOOD!  All you have to do is start with a crock pot, good quality pork roast, a few simple ingredients and BAM!  Amazing meal!  I hope you try it and love it, just like we did!


Ingredients:
1- 24 oz (1 lb 8 oz) center cut pork tenderloin (we like Hormel)
Some seasoned salt (such as Lawry's) to taste
3/4 cup apple juice
2 tablespoons teriyaki sauce
1-2 cups beef stock
1 medium white onion, cut into eigths
6-7 garlic cloves, peeled


Preparation:
First, pour your apple juice, teriyaki sauce and beef stock into your crock pot. Second, rub the seasoned salt on all sides of the roast.  Then in a heavy duty saute pan, brown all sides of the roast to lock in flavor and juices.  Next, put your browned roast in the crock pot.  The liquid in the crock pot should cover 3/4 of the height of the roast.  Add the chopped white onion and peeled garlic cloves.  Turn crock pot on low for 7 hrs.  Every so often while it's cooking, take the lid off and spoon the cooking juices over the top of the roast.  Once the roast is finished slow cooking, take it out and let it rest while you make the glaze.


For the gravy/glaze:
Strain the drippings/cooking broth through a sieve into a medium sized sauce pan.  Put the pan over medium heat.  Take one tablespoon of cornstarch and mix it with a small amount of the cooking broth.  Add back to the pan and cook until the broth starts to boil and thicken.  Should only take about 2-3 minutes.


image by Kara  


Friday, August 26, 2011

Quick Beef Stroganoff

This was dinner at our house a few nights ago and it did not disappoint!  Quick and flavorful!  A family favorite for sure!


Ingredients:
1-1 1/2 pounds 93% lean ground beef
1 (16 oz) tub of sour cream
2 (10 oz) cans cream of mushroom soup
1/8 teaspoon ground red pepper
salt to tastes
2 (8 oz) bags no yolk egg noodles


Brown the lean beef in a large saute pan.  No need to drain fat!  Add the sour cream, cream of mushroom soup, red pepper and salt.  Mix thoroughly and simmer on low, stirring occasionally, for 10 minutes.  Prepare noodles as suggested on the bag!  Enjoy!

Monday, August 15, 2011

Lemony Herb Chicken

This chicken can either be baked in the oven or thrown on the grill. Pick your poison! I decidedly pounded out the chicken breasts, making them thinner and therefore decreasing the cooking time. This meal was just right for a summer evening- quick, light and satisfying.


Recipe:
6 boneless skinless chicken breasts
Juice of 1 lemon, make sure it's ripe and juicy, if not use two lemons 
2 cloves garlic, minced
1/4-1/2 cup extra virgin olive oil
1 tablespoon dried tarragon
1 bunch green onions, chopped finely
1 1/4 teaspoons coarse salt + more for seasoning each chicken breast
1 teaspoon freshly ground black pepper + more for seasoning each chicken breast


Preheat oven to 350 degrees. 


Pound each chicken breast out to an even thickness. About a 1/4 to 1/2 in thick. Season each chicken breast lightly with salt and pepper on both sides. Set aside.


Squeeze juice of 1 lemon directly into baking dish (9x13). Remove any lemon seeds that may have fallen in. Add in olive oil, tarragon, S and P, minced garlic and green onions. Stir mixture with spoon to combine.


Side note: I halved this recipe. That's why you only see three chicken breasts in the pictures!
Lay chicken breasts in with marinade. Spoon marinade over chicken breasts and move them around to coat evenly. Cover with tinfoil and refrigerate for a couple hours to marinade further or bake (or grill) immediately. 


Bake for 20 minutes or until chicken breasts are cooked through. Remove from oven, serve and enjoy!

images by Briana

Monday, August 8, 2011

Coconut Curry Chicken & Veggies W/ Mango Rice

We love anything with curry and coconut at our house!  So a few weeks ago I took a recipe a found at familyfun online and modified it from a salad to a dinner dish with rice!  It was a hit!  And very easy to make!  I love summer recipes that are fresh and fairly light which equals feeling satisfied and not overly stuffed after eating!!!!!  


Ingredients:
For marinade and sauce:
Mix together the following:
1 (14 ounce) can regular or light coconut milk
1 tablespoon Thai red curry paste (or more for your tastes)
2 teaspoons freshly grated orange zest
1/2 cup freshly squeezed orange juice
1 tablespoon kosher salt
Divide the sauce/marinade in half.  Put 4 chicken breasts in a gallon sized ziploc bag with half of the sauce.  Let it marinate in the fridge for at least an hour.  Set other half of the sauce aside!  

For Rice:
1 3/4 cups chicken stock
1 cup jasmine rice
2 ripe mangoes, cut into bite sized cubes
Bring chicken stock to a boil.  Add the rice and reduce the heat to simmer.  Cover the rice and cook for 15 minutes.  Grill your marinated chicken while the rice is cooking.  About 5 minutes per side over high heat!  Add cubed mangoes after the rice is cooked.

For Veggies:
1 red pepper, seeded and sliced into thin strips
half a head of green cabbage, sliced thinly
1 large handful of sugar snap peas, tough ends cut off
1 large handful of bean sprouts
Throw prepared veggies into a large saute pan with the remaining half of the coconut curry sauce.  Cook over medium heat until veggies are just slightly tender.  About 5 minutes.

Plate your dinner however you would like!  We did the mango rice on the bottom, followed by the cooked veggies and grilled chicken on top!  Enjoy!


image by Kara


Wednesday, July 27, 2011

Hash Brown Quiche

Family dinners have been sorta non-existent around here. This summer we've been go-go-go and although we've been having a ball, I've sorta missed cooking dinner and sitting down to eat at our little dining table. I think I've only been to the grocery store once in the last 2 1/2 weeks, which has got to be a record for me!

Yesterday, I went to the grocery store (finally) and picked up ingredients to make quiche for dinner. I recalled Paula Deen making a quiche using a hash brown crust on her show awhile ago. I thought that was sort of a radical idea and it stuck with me. I'm usually not too jazzed on recipes that mess with a timeless classic, like quiche, but I thought this idea was accessible and I thought you all might respond to it. I was really pleased with the results and the four of us downed the whole quiche in one sitting! Let me know what you think and thanks for stopping by today!

Recipe (9 in pie plate):

3 cups hash browns, thawed
5 tablespoons butter, melted (4 tablespoons for crust and 1 tablespoon to saute onion and pepper)
4 large eggs, beaten until smooth
1 1/4 cups milk (don't go any lower then 2%, pretty please)
1 bunch green onions, white and light green parts only, finely diced
1 red bell pepper, diced
3/4 cup diced cooked ham (I used Boars Head brand ham from my grocers deli)
1 cup sharp cheddar cheese, shredded
salt and freshly ground pepper to taste
Preheat oven to 450 degrees.

Spread 3 cups of thawed and refrigerated hash browns out on paper-towels. Allow excess moisture to drain and pat dry.

Combine melted butter and hash browns in a bowl. Press and mold buttered hash browns evenly into a 9 inch pie plate to form the crust. Bake for 20-25 minutes, or until hash browns are browned and crisping up.

While the hash brown crust bakes, prepare the filling:

Saute green onion and red bell pepper with a tablespoon of butter. Cook until softened.

Combine beaten eggs and milk in a large mixing bowl. Add cheese, ham and cooked onion and red pepper. Shake a little pepper in and a pinch of salt. You don't need to season much because of the ham, cheese and butter already in the dish that will add a lot of salt. When the hash brown crust is ready, carefully pour the egg mixture over it and return to oven.

Lower the oven temperature to 350 degrees F and bake for about 30 minutes or until the quiche is golden brown on top and puffed and/or set in the middle and jiggles only slightly.

Remove from oven and allow to cool for at least 10 minutes before serving.

images by Briana
recipe for the filling is my own, the hash brown crust measurements are Paula Deens

Friday, July 15, 2011

Teriyaki Beef Skewers w/ Grilled Vegetable Slaw

 Hi Guys!  So I think I've mentioned before that we have been trying to use our grill as much as possible now that Summer is in full swing!  There is nothing like being outside in the backyard, enjoying the evening shade and the aroma of bbque coming off the grill!  Which leads me to this easy recipe!  Enjoy!


Ingredients needed:(quantities based on feeding 4 people)
4-8 ten inch wooden skewers, soaked in water
4-5 large good quality steaks, I used New Yorks
1/2 of a head of green cabbage
1 red pepper
1 small bunch green onions
3 pineapple spears, fresh or canned
1 cup dry Jasmine rice, prepare according to package directions.

First, trim and cut into cubes your meat of choice.  Put the cubed meat into a ziploc bag and add a little of your favorite teriyaki sauce.  Shake the bag well so the meat gets evenly coated.  Put it in the fridge and allow it to marinate for at least 30 minutes!  

Then, prepare your vegetables for the grill!  Cut your cabbage into quarters.  The other vegetables are already good to go!

Prepare the jasmine rice.  While the rice is cooking, take your meat out of the fridge and put the cubes of meat on skewers, 5 to a single skewer!  Brush your grill with vegetable or canola oil (helps the meat not stick) and turn it on to medium high!  

Once you've put your meat and vegetables on the grill, turn the meat every 3 minutes for even grilling and caramelizing.  Turn your vegetables once they have slight grill marks.  You still want the vegetables to have a crispness, not cooked all the way through!

Once everything is grilled to perfection, prepare your vegetable slaw by cutting the tough ends off of the cabbage and thinly slice it.  Peel the charred skin off of the red pepper and slice into thin spears.  Chop up the green onions and pineapple.  Throw all the sliced and chopped vegetables together in a large bowl.  Add a little canola oil and your favorite teriyaki sauce and mix to coat the veggies!  Now you are ready to serve!  Plate it up like we did in the picture or however you would like!  This is an amazing meal that will leave you feeling good and satisfied but not weighed down!

images by Kara  


Wednesday, June 22, 2011

Cowboy Quesadillas


Crock-pots are magical contraptions. Time and time again, I throw chicken breasts in the crock-pot with some kind of sauce, cook it on low for the better part of the day and then call it dinner. MA-GIC. One of my favorite sauces to crock-pot with chicken breasts is barbecue. OH, it's yours too?! I thought so.
Crock-potted barbecue chicken gets AROUND in my kitchen. I toss it in salads, sprinkle it on pizzas, pile it in potato rolls, layer it in quesadillas, or serve it up with a loaded baked potato on the side (my favorite way).

This quesadilla is just one of the many, many ways to use crock-potted barbecue chicken. It's messy and I have to say, I LOVE that about it. Sometimes you just need a little messy in your life. These are meant to be made and then immediately devoured with plenty of finger lickin' along the way. I don't serve them with anything on the side- no sour cream or salsa. These can stand alone. At our house, we usually lay a paper towel down for each place setting and then I serve the quesadillas straight from the cutting board after cutting up into wedges.
I hope you enjoy these as much as we do! Thanks for stopping by!

Recipe (will make 3 10 in sized quesadillas, serving up to 6 people):

For the crock-potted chicken:
3 boneless skinless chicken breasts
Enough barbecue sauce to coat and cover chicken breasts

Place chicken breast in crock-pot. Pour barbecue sauce over chicken. Stir to combine and coat. Cook on low for 6-8 hours. After cooking, remove from crock-pot and shred using a fork. Cover and refrigerate or move right into making the quesadillas if you are ready.

For the quesadillas:

6 10 in tortillas
Roughly 3-4 cups shredded cheese (mozzarella or jack, preferably)
1 15 oz can chili beans, divided between three quesadillas (chili beans are simply pinto beans with seasonings and tomato paste)
Cooked and shredded barbecue chicken
3-4 tablespoons red onion, FINELY diced (you could also use green onions)
Barbecue sauce for drizzling in the quesadilla

Start by heating your skillet, over medium to medium-low heat. After skillet is heated, in this order, layer a single tortilla, 1/2 cup-3/4 cup shredded cheese, shredded chicken (equal to 1 chicken breast), chili beans, and a healthy drizzling of barbecue sauce.
Top with more cheese.
Top it all off with another tortilla.
Cover skillet with lid. Cook quesadillas for 5 minutes per side (medium-low to medium heat), or until the cheese is all melted through. It's important to cover the quesadilla while it cooks. It will trap the heat, ensuring that the layers of beans, cheese, and chicken get properly heated through.

Transfer cooked quesadillas to cutting board. Cut into wedges. Serve.
images by Briana