Two sisters cooking and creating...and neglecting laundry. Welcome to our slice of the internet!
Showing posts with label sandwich. Show all posts

Sunday, August 12, 2012

Giant Sub

Darn. Summer is almost over. It's been such a good one. And how about those Olympics?! I watched everyday and even shed tears from time to time. It was all so amazing. Did you guys watch?  
We started a little tradition of sorts this summer. On Saturdays, for lunch we make a giant sub from a loaf of french bread. It's goofy but we all look forward to it. I totally enjoy all of us gathering around the island and building Giant Sub. I think we even marched around and chanted GIANT SUB! GIANT SUB! one time.
You guys should make a Giant Sub yourselves and take it to a park for a little end of summer shindig. Or make it for family night. Or wouldn't it be fun with a group to do a Top Chef style competition to see who can make the best Giant Sub? Do I need to keep going?
Here are some tips on how to build your sub:

-Use a 99cent loaf of fresh french bread
-Any deli meat you prefer, about a pound. (we like roasted chicken) *You can add more meat if you prefer.
-SALAMI! Word to the wise, this MAKES the sub. *I like to use an uncured, nitrate free and natural salami.
-sliced cheese, we've used Swiss most times
-lettuce, tomatoes, cucumber, avocado, onions- any toppings you like on your sandwiches
-mayo, mustard and pepper. You could hit it with some balsamic too.

Slice the french bread, filet open. Layer toppings, starting with meats (fold deli slices in half) and cheese. Top with all your vegetables. Generously spread mayo and mustard or any other spreads you prefer on the other half of bread. Sprinkle with pepper and close. Slice with a serrated knife and enjoy!  

*One Giant Sub will feed 4-6 people.
images by Briana from my instagram

Monday, February 6, 2012

Yam & Black Bean Burgers

Burgers are one of my favorite things in life. Last week I set out to make a veggie burger that didn't leave me longing for a juicy and flavorful beef patty in its stead. I came up with these yam and black bean burgers. So delicious! This recipe makes enough for you to freeze some for later use. Make sure and read through all the instructions before you begin so everything comes together properly. Enjoy!

Recipe (yields 10 burgers):
1 15 oz can black beans, drained and rinsed
1 large yam (or sweet potato), peeled and cut into eighths 
8 oz container fresh mushrooms (any variety you choose), roughly chopped
1 cup uncooked short grain brown rice
1 egg
1/2-1 cup bread crumbs (you could use wheat, white, even crushed crackers)
1 bunch green onions (white and light green parts only), chopped
1 large kale leaf (or 2 medium), washed, ribs removed and chopped up
2 cloves garlic, minced
1 teaspoon chili powder
salt and pepper to taste

1. Fill a small-medium sized pot with water. Add your yam pieces to water and bring to a boil. 
2. Using a rice cooker (or in a pot over the stove), cook your 1 cup of short grain brown rice according to package instructions or the instructions that came with your rice cooker.
3. In a medium sized skillet, add a tablespoon of olive oil. Turn heat on to medium. When the oil is heated, add mushrooms, chopped kale and chopped green onion. Allow to saute and soften, stirring often.
4. In a large mixing bowl, add the drained and rinsed black beans. Roughly mash up the beans .
5. Turn your attention back to mushroom mixture. Stir it some more. Lightly salt and pepper it.
6. When rice is done, fluff it then add to the black beans. 
7. The mushrooms should be reducing, the kale wilting and the onions softening. Add minced garlic to the mixture. Stir around to combine.
8. Check on the yam. You want the yam to be soft enough but not mushy. This should take 10-15 minutes.
9. Transfer the mushroom mixture to a food processor. Pulse until the mixture resembles a semi-coarse meal. Pour the processed mushroom mixture into the bowl with the brown rice and mashed black bean.
10. When the yam is soft enough, turn heat off and remove yam eighths. Add the yam to the food processor and pulse until it resembles a semi-coarse meal. Add the processed yam to the big bowl with all the other ingredients. Now, give the mixture a thorough stir, making sure everything is combined. Add 1 teaspoon chili powder. Stir some more. Taste the mixture and add more salt and pepper if it needs.
11. Add bread crumbs and egg to the mixture and stir thoroughly. Add a full cup of bread crumbs if the mixture isn't coming together into patties easily.
12. Using a 1/3 cup, scoop the mixture and form into patties. Place patties on waxed paper. Cover and refrigerate (or freeze individually in baggies) until time to use.
13. You can cook the patties a few different ways: Bake them in the oven at 375 degrees for 10 minutes on each side. In a skillet (lightly oiled) cook for 8 minutes per side over medium-high heat. If grilling, lightly oil some aluminum foil and cook the patties on top of it over the grill. Allow frozen patties to sit at room temperature for 10 minutes before cooking.
14. Dress the burgers with toppings you love and serve!
You can also choose to skip the bun and eat them with a fork and knife if you like! Thanks for letting me share this recipe with you today!

images and recipe by Briana
Pin It

Friday, November 25, 2011

Tomato, Mozz and Avocado Panini

I made this panini a few weeks ago and it was DELICIOUS!  Even my husband, who thinks a good sandwich should include meat, was sneaking bites as I was busying myself around the kitchen and wasn't looking!;)  


What you'll need:
2 slices of good quality honey whole wheat bread
1 layer of good store bought pesto spread on the inner side of both slices of bread
About 4 slices of fresh mozzarella
1/2 of an avocado sliced
1 roma tomato sliced


Build your sandwich and put it in your panini maker for roughly 2-2 1/2 minutes. Cut in half and enjoy!


image by Kara


Saturday, November 12, 2011

Tuna Melts


I made these for lunch, but I'd whip them up for a weeknight meal in a heartbeat with some sweet potato fries on the side. Enjoy and I hope you're having a relaxing weekend!


Recipe (yield 2 open face sandwiches):


1 6 oz can white albacore tuna, drained
1/3 cup mayonnaise (Best Foods brand)
Splash of pickle juice
1 tablespoon white onion, grated (you could also finely dice green onion)
1 tablespoon sweet relish, optional
1/2 cup celery, finely diced
1/4 teaspoon black pepper
2 slices thick white bread
Butter for spreading
2 slices good quality swiss cheese


Preheat broiler. Toast and butter bread. In a small bowl, mix together tuna, mayo, pickle juice, onion, celery, relish (if you're using it) and black pepper. Add more mayo if needs be. Divide tuna mixture between bread slices. Top with swiss cheese. Broil 2-3 minutes, or until cheese begins to bubble and melt. Remove from oven and enjoy!


images by Briana

Friday, August 19, 2011

Garden Sammie


Garden fresh tomatoes and cucumbers, crisp romaine, sprouts and fresh mozz make up this sam. You are going to love it!
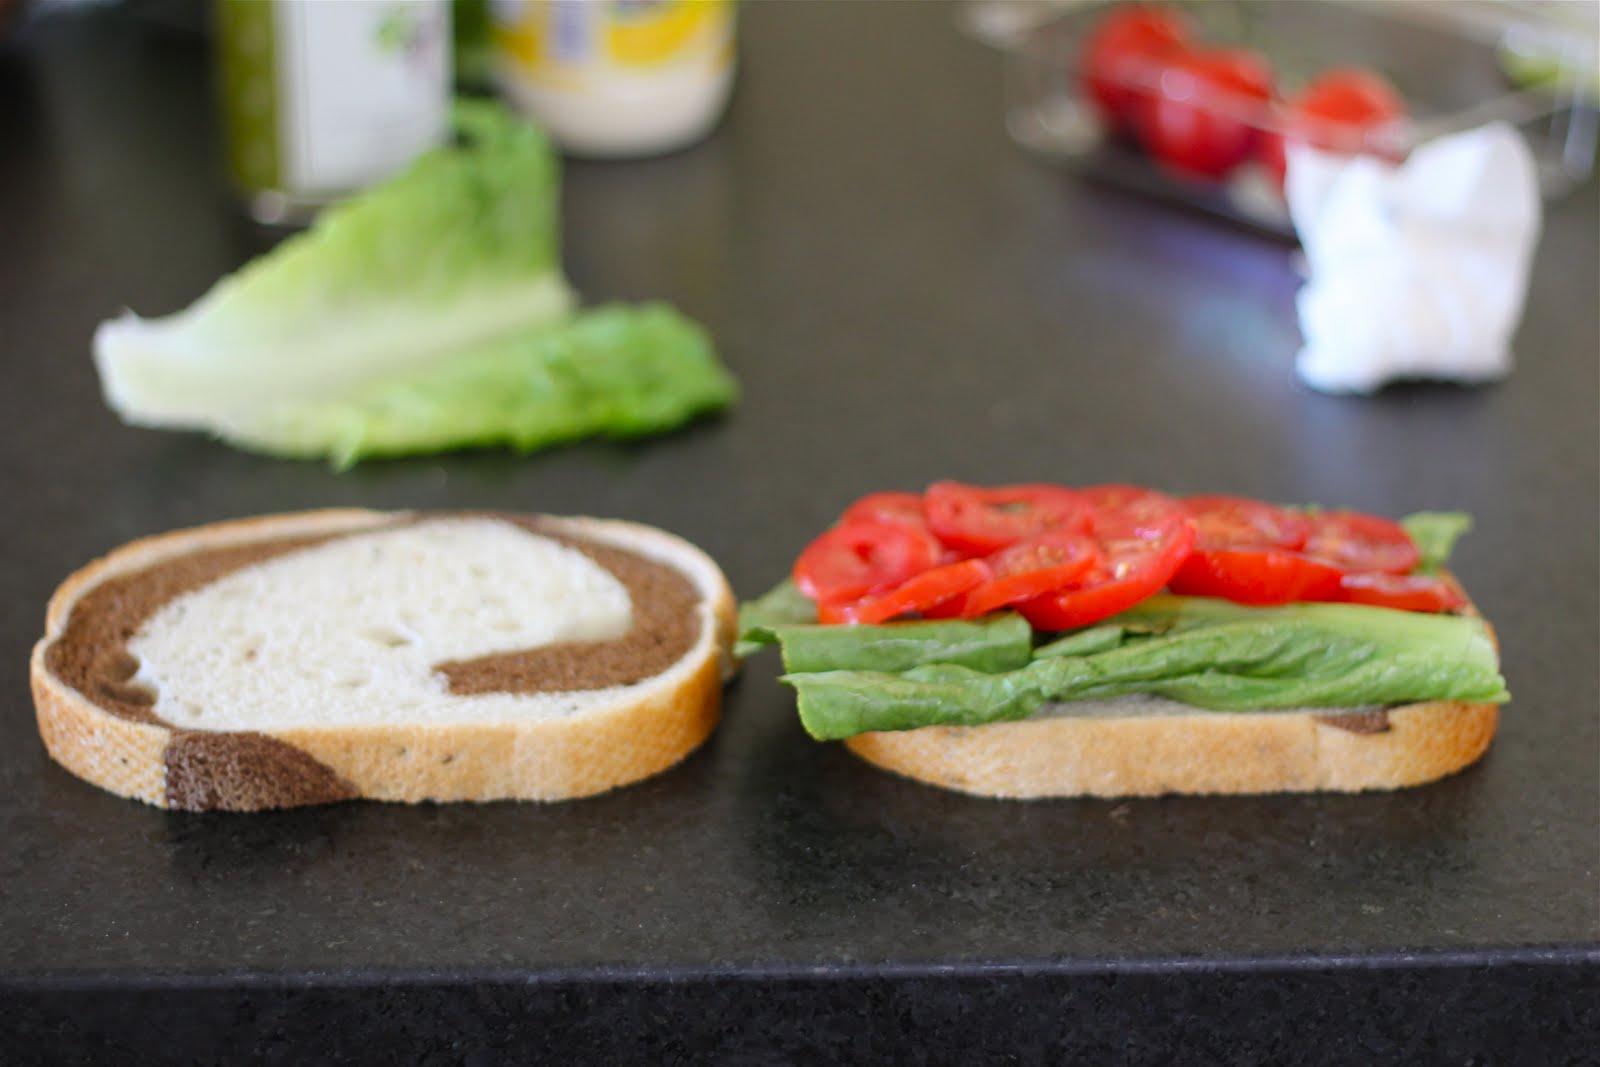
Start by lightly toasting your bread (or not). Spread a thin layer of mayo on one side of bread (make sure it's Best Foods brand). Layer lettuce and tomato.
Then your sliced fresh mozz, cucumber, sprouts. Hit this with a little fresh cracked pepper and salt.
Slice and devour.

Hope you all have a wonderful weekend! We're going to try and go camping. Fingers crossed it happens. See ya next week, guys. Thanks for stopping by!

*I forgot to tell you that I've got a delicious Buttermilk-Peach cake that I'll be posting next week. Soooooo good. Until then!

images by Briana


Thursday, October 28, 2010

Homemade "Manwich" Sloppy Joes

Let's talk about the good ol' Sloppy Joe! Sloppy Joes take me back to my youth and Halloweens past! Instead of the traditional Chili that was on the stove in most houses on Halloween night, our Momma would slow cook a large batch of Manwich! And all of us kids would devour 2 and sometimes 3 of these babies before heading out into the cold autumn night for trick or treating! Now, I will never be one to bag on Manwich, because I love it and it's what I grew up on! Having said that, I was able to find a recipe that very quickly and easily allows you to make homemade "Manwiches" without all the added sodium and preservatives! This recipe is AM.AZ.ING friends! You will love it!
Ingredients: Make roughly 4-5 Sloppy Joes
In a small sauce pan, over low heat mix:
8 ounces of tomato sauce
1 cup ketchup
1/4 teaspoon mustard
1 tablespoon small diced green pepper

In a small bowl mix together:
1 1/2 teaspoons dry minced onion
1 teaspoon salt
1/2 teaspoon dry minced garlic
1/2 teaspoon chili powder
1/4 teaspoon celery seed

Mix the dry ingredients into the sauce pan with the tomato sauce mixture. And allow to simmer over low heat. Stir occasionally.
While the sauce is simmering:
Brown 1 pound of ground beef in a saute or fry pan. (I like to use ground sirloin)
Drain off any excess fat from the cooked beef.
Add the homemade "Manwich" sauce to the cooked ground beef in the fry pan and allow to simmer over low heat for another 10-15 minutes!
Spoon hot homemade Manwich onto lightly toasted hamburger buns. (my favorite buns are Sara Lee Hearty and Delicious 100% Whole Wheat or White! Serve with some cool and crisp veggies and ENJOY!

Tip: If you have a little bit of extra time, after you have mixed the homemade sauce with the cooked beef I might suggest putting it in your crockpot on low heat for 2 hours. Definitely not a must, but really adds more depth of flavor to your already tasty Joes!:)

images by Kara

Sunday, August 22, 2010

Dad's Famous Barn Burgers

I've said it before and I'll say it again! "Our Dad is MASTER of the grill!" I will never pass up an opportunity to eat one of his Barn Burgers! These burgers are, without a SHADOW.OF.A.DOUBT, the best I have ever tasted! And I'm not being biased! It's just the truth! Tender, flavorful and oh so juicy! My mouth is watering as I type! I've been lucky enough to know the basics of his burger making techniques, but last night he took me through his detailed process start to finish! And we are going to share that process with you right now!

Dad says you need to start with the best meat for burgers! His choice is top sirloin! Go to your local grocery store butcher and tell him(or her;) that you would like x lbs of top sirloin(for example 2 lbs of meat will make roughly 5 burgers at just over 6 ozs per burger) with the fat cap left on and run through the grinder 2 times! What you are trying to achieve by leaving the fat cap on is the perfect 80/20 lean meat to fat ratio! Dad also says that you should tell the butcher if the fat cap doesn't supply the 20% needed fat, he should add prime rib fat to make it to 20%! I know this all sounds complicated but once you've done it a few times, it will become second nature to order your hamburger meat this way!
Now for making the patties. Our Dad uses a salter scale to make each patty 6oz or slightly over. If you don't have a scale, no worries! Just form them a little smaller than a baseball.(not softball)
From ball form, lightly press from center to edges. Each patty should be about 1/3 inch thick.
Do not pack or press down hard. And don't worry about how uniform the patties look. They will be almost loose enough you may worry about them falling apart on the grill. The loose texture creates a more tender and juicy burger. If they are packed too hard the burgers will be hard and dry.
Sprinkle both sides of the patties with COURSE ground pepper. This is so you can actually see how much pepper you are putting on each. If you use the regular ground pepper, you could end up using too much and over flavoring your burgers. Next sprinkle Lawrys Seasoned Salt on both sides.
To grill his burgers our Dad uses the searing feature on his grill. It reaches a temp of about 800 degrees. He goes 1 minute per side on sear and then transfers the burgers to the regular part of the grill on high heat for 2 minutes per side. For most of us who don't have the searing feature, grill over high heat for 4 minutes per side.
Our Dad's GOLD STANDARD is the minute the juices on top of each burger go from running pink to slightly clear, take them off the heat or they will over cook and become dry!
Dress your burger any way you like! It's impossible to go wrong with burgers this GOOD!
Thanks for sharing your "Burger Prowess" with us Dad! We love you!

images by Kar

Wednesday, August 18, 2010

The Spanglish Sandwich


Remember the movie, Spanglish? Adam Sandler whips up a sandwich consisting of rustic bread, cheese, bacon, lettuce, tomato, and an over-easy egg. This is my favorite part of the movie-- especially when he cuts the sandwich in two and the sliced yolk drips down the sides and pools on the plate. Talk about movie magic! Anywhooo, the movie has been out for a long time and I'm sure this has been blogged about here or there, but I needed to post it here because A) This is one of my top 5 favorite sandwiches of all time and B) My toddler and I shared one for lunch today and I snapped a pic.

Wanna know who came up with this sandwich? The oh so famous, Thomas Keller. Ya, you know it's gonna be good now. Smiley face.

Recipe:

3-4 slices of bacon, cooked
2-3 slices Monterey Jack cheese (enough to cover the face of bread)
3-4 slices of tomato
2 leaves butter leaf lettuce
1 egg
2 slices country loaf bread (good quality), lightly toasted
1 tbs mayo
1 teaspoon butter

Pre-heat oven to 350 degrees. Take one slice of toasted bread and spread mayo over it's face. Layer on top of that your tomato, bacon, and lettuce. Set aside. Now, take your other slice of toasted bread and arrange slices of cheese on the face. Place on a small cookie sheet and allow to melt in your oven (350 degrees) for a few minutes or until cheese is completely melted. Remove from oven and set aside. In a pre-heated skillet at low heat, add butter and allow to melt. Crack your egg and dispense directly in skillet. Allow to cook for a couple minutes. When the egg white has become opaque, you are ready to flip it. You can do this very gently (making sure not to break the yolk) with a spatula or you can try and flip it in the pan with a little wrist coordination. SHOW OFF! After you have flipped your egg you can opt to cook it a little longer to have an over-hard (firm yolk) egg or you can go for the over-easy (runny yolk). Today, I cooked mine a little longer (somewhere in-between firm and runny)...I don't have an explanation- it's just what I did on this particular day. When your egg has reached your desired done-ness. Take the slice of bread that has the tomato, bacon, and lettuce. Slide your egg directly from the skillet on top of the layer of lettuce. Make sure the yolk is somewhat centered in relationship to the bread. Top it off with slice of bread with melted cheese. Cut in two and watch the magic unfold.

Here is a video of Thomas Keller and Adam Sandler making this perfect sandwich.

Image by Briana

Monday, August 16, 2010

Good Morning!

Happy Monday! It was a busy weekend at our house. We spent most of Saturday cleaning, organizing, and de-junking our garage. We were starved when it was all said and done, so I whipped up some grilled cheese with tomatoes (from the garden!) and we WOLFED them down. A grilled cheese never fails-- add tomatoes from your garden and it's sublime. Look and see the awe and wonder:
Making a grilled cheese is pretty straight forward, but if you want to see how I do it, read on.
  • I like colby cheese (Tillamook brand) that I have sliced myself. It melts ooey gooey and the flavor is just right.
  • If you should add tomato slices, make sure you give them a good shot of pepper.
  • Lightly butter the outer face of bread. A must.
  • Cook slowly over medium-low to low heat, allowing the cheese to melt all the way.
I'll be back tomorrow with a legitimate recipe. I promise. :)
Image by Briana

Thursday, August 12, 2010

Fruit Sushi For Kids (and Big Kids)

Aaaaw, look! It's fruit sushi! Fancy....sorta.

I don't know about you, but lunchtime/snacktime is like a broken record around here. We eat the same things day, after day, after day (Are you like me?). Today I decided to switch it up and make something that would be fun to eat and make with my toddler. It was yummy, easy, and fun. Everybody wins!

What you'll need:

2 uncooked wheat tortillas (found in the refrigerated section)
1 medium sized RIPE banana, peeled
1/2 cup raspberries
3 tbs peanut butter, or more if desired (I like Adam's and Skippy Natural)
3 tbs Nutella, or more if desired
Cinnamon for sprinkling

Cook your tortillas, one at a time in a large skillet over medium heat. Make sure they don't get too crispy, you want them pliable. Allow to cool. Lay cooked tortillas on a flat clean surface. Take peanut-butter and spread it evenly over the surface of the tortilla. Make sure and spread it as close to the edges as possible. Thinly slice banana and then proceed to lay the banana slices over the peanut-butter, making sure to cover the whole surface. Very lightly dust some cinnamon over the banana. You are now ready to roll. Roll the tortilla away from you gently. Take care not to smash it. With a sharp knife, slice every 1/2 inch.

Spread nutella evenly over the surface of your last tortilla. Make sure and spread as close to edges as possible. With clean hands, take raspberries and split them in two and place them all over the nutella, making sure to cover the whole surface. Now you are ready to roll it up. Roll the tortilla gently away from you. Take care not to smash it. With a sharp knife, slice your roll every 1/2 inch.

Serve with thinly sliced veggies (aaaaw, cute) for some balance, as I know this is more like a dessert! Enjoy!

image by Briana

Monday, August 2, 2010

Summer BLT's

The plate below was Sunday dinner at our Mom and Dad's this week and it was HEAVEN! I always forget about the good ol' BLT. Well NO.MORE! These sandwiches are quick, easy and so amazingly flavorful I had to go back for seconds! Crisp and salty bacon, refreshing and crunchy romaine and big juicy slices of tomato, sandwiched between warm and toasty bread...mmm...ya, you get the idea.:)
Now, obviously you don't need a recipe to make a great BLT, but here are a few tips:
1. Save yourself some time and a whole lot of mess by using fully cooked bacon. Just warm it for 20-30 seconds between paper towels in the microwave.
2. Make sure you buy LARGE tomatoes. Big enough that one slice covers the entire sandwich.
3. Save more time by using a bag of ready to use romaine lettuce. Major plus because you won't have to rinse, dry or chop the lettuce.
4. Whichever bread you choose to make your BLT's with, make sure you lightly toast it! An absolute MUST!
5. Whether you're a mayo or miracle whip fan, be generous with this Good Stuff!

image by Kar